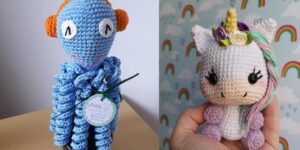
Embroidering faces on amigurumi is a delightful way to add personality and charm to your crocheted creations. This article will guide you through the techniques and inspirations for embroidering faces on amigurumi, ensuring your projects stand out with expressive and detailed features.
Why Embroider Faces?
Embroidering faces allows for greater creativity and customization. Unlike safety eyes and premade features, embroidery lets you control every detail, from the expression to the unique characteristics of your amigurumi.
Materials Needed
1. Embroidery Floss
- Description: Comes in a variety of colors and is perfect for detailed work.
- Tip: Use high-quality floss to ensure durability and vibrancy.
2. Embroidery Needle
- Description: A needle with a larger eye to accommodate the floss.
- Tip: Ensure the needle is sharp enough to pass through the yarn smoothly.
3. Stitch Markers or Pins
- Description: Helpful for marking the placement of facial features.
- Tip: Use contrasting colors for visibility.
4. Scissors
- Description: Small, sharp scissors for cutting floss cleanly.
- Tip: Keep them handy to trim excess floss as you work.
Basic Embroidery Stitches
1. Backstitch
- Usage: Ideal for outlining and creating smooth lines, such as smiles or eyebrows.
- Technique: Bring the needle up through the fabric, then back down a short distance away. Bring it up again a short distance ahead of the first stitch, then back into the end of the previous stitch.
2. Satin Stitch
- Usage: Perfect for filling in small areas like noses or eyes.
- Technique: Create a series of parallel stitches close together to fill an area completely.
3. French Knot
- Usage: Great for creating small, raised dots, such as eyes or freckles.
- Technique: Wrap the floss around the needle twice, then insert the needle back close to the entry point, pulling the floss tight.
4. Stem Stitch
- Usage: Useful for curved lines, such as mouths or curved eyebrows.
- Technique: Bring the needle up through the fabric, then down a short distance away. Bring it back up halfway between the start and end points of the previous stitch, keeping the floss below the needle.
Step-by-Step Face Embroidery
1. Plan the Face
- Step: Decide on the facial features and their placement. Use stitch markers or pins to mark the positions.
2. Outline the Features
- Step: Use backstitch to outline features like the mouth and eyebrows.
3. Fill in Details
- Step: Use satin stitch to fill in areas like the nose or large eyes. Add French knots for pupils or other small details.
4. Create Expressions
- Tip: Experiment with different shapes and angles to create various expressions. For example, a slight curve in the mouth can change the expression from happy to smirking.
5. Secure the Floss
- Step: Knot the floss securely on the inside of the amigurumi to prevent unraveling. Trim any excess floss.
Creative Inspirations
1. Animal Faces
- Example: For a cute bunny, use a small satin stitch for the nose, backstitch for the mouth, and French knots for the eyes.
2. Human Faces
- Example: For a doll, use backstitch for eyebrows, satin stitch for the lips, and French knots for the eyes. Add details like eyelashes or freckles for more character.
3. Fantasy Creatures
- Example: For a dragon, use bold colors and stitches to create scales, fierce eyes, and expressive eyebrows.
4. Cartoon Characters
- Example: Recreate beloved characters by carefully planning and stitching their distinctive facial features. Use photos as a reference to capture their essence.
Tips for Success
1. Practice Makes Perfect
- Tip: Practice on a scrap piece of fabric or yarn before working on your amigurumi to perfect your technique.
2. Keep It Tidy
- Tip: Keep the backside of your work neat by avoiding knots and securing floss ends properly.
3. Use Contrasting Colors
- Tip: Ensure your embroidery stands out by using contrasting colors against the yarn of your amigurumi.
4. Reference Images
- Tip: Use images of real faces or drawings as a reference to get the proportions and details right.
Conclusion
Embroidering faces on amigurumi is an art that adds individuality and life to your creations. With practice and creativity, you can master various techniques to create expressive, unique faces that make your amigurumi truly special. Enjoy the process and let your imagination guide your stitches!


